In electrical systems, interference is rarely a single fault. It usually comes from a switching source, a return path that is too generous, and cabling that has started behaving like an antenna. Effective RFI/EMI filtering is therefore less about one magic component and more about choosing the right parts, placing them correctly, and keeping the wiring honest.
That matters in control panels, drive systems, industrial power supplies, and IoT hardware, where noise can mean anything from random resets to failed EMC testing. In this article, I focus on the practical side: what the noise actually looks like, which components fix which problems, and how I would approach the job in a UK electrical system.
The fastest way to quiet a noisy electrical system
- Start with the noise path before you choose a component; conducted and radiated problems behave differently.
- Common-mode chokes, X capacitors, Y capacitors, ferrite beads, and shield bonding each solve a different part of the problem.
- Placement matters as much as the part itself; a good filter installed badly often performs like a mediocre one.
- UK EMC expectations still require both low emissions and usable immunity in real operating conditions.
- Most failures are caused by layout, grounding, or cable routing long before the filter value becomes the real limitation.
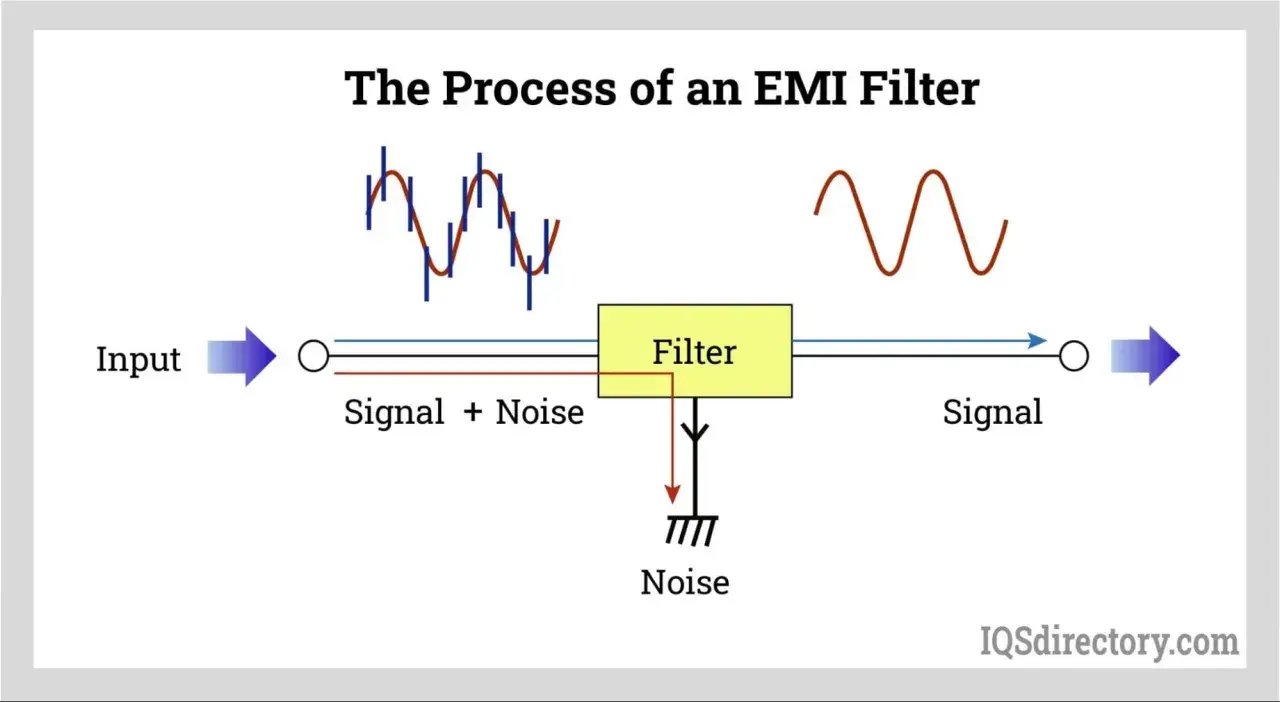
What EMI and RFI look like in a real electrical system
When I troubleshoot interference, I separate it into two questions: is the noise being conducted along wires, or is it being radiated through space? Conducted emissions are usually the first battlefield because many test methods and debugging setups start around the 150 kHz to 30 MHz band. Above that, enclosures, cable exits, and even poor bonding details can turn a machine cabinet into an unintended transmitter.
Common mode and differential mode are not the same problem
Common-mode noise appears on both conductors in the same direction relative to earth or chassis. Differential-mode noise is the unwanted voltage between the two conductors. I care about that distinction because the cure is different: common-mode problems usually need impedance to chassis or earth, while differential-mode problems usually respond better to series impedance and across-the-line capacitance.
Read Also: Motor Circuit Protector vs. Breaker - Which to Choose for Motors?
Noise usually starts at the source, not at the cable
The usual culprits are switched-mode power supplies, VFDs, servo drives, solenoid coils, relay contacts, and fast digital edges from control electronics. In industrial automation, one noisy 24 Vdc supply or one long motor lead can contaminate several apparently unrelated subsystems. That is why I do not start by “adding a filter” in the abstract; I start by asking which part is generating the noise, and how that noise is getting out.
Once the noise path is clear, it becomes much easier to choose the right component family rather than guessing at random capacitance or inductance values.

The components that do the heavy lifting
I think of filtering as a toolkit, not a single device. The right answer on a mains input is not the same as the right answer on a sensor cable, and the wrong part can create leakage-current, heat, or signal-integrity problems that are worse than the original noise.
| Component | What it is best at | Where I usually place it | Main trade-off |
|---|---|---|---|
| Common-mode choke | Blocking noise that rides on both conductors together | At the power or signal entry point | Size, cost, DC resistance, and saturation risk at high current |
| X capacitor | Shunting differential noise across line and neutral | Across the mains input or DC pair | Can increase inrush current and must be safety-rated on mains |
| Y capacitor | Diverting common-mode noise to chassis or earth | From line to earth or chassis | Touch current and leakage current limits constrain the value |
| Ferrite bead or clamp ferrite | Absorbing high-frequency noise without changing the whole circuit | On PCB rails or around an external cable | Useful only over a target band; too much impedance can hurt signals |
| Feedthrough or LC filter module | Very high-frequency suppression at the cabinet boundary | At panel entry or on a filtered connector | More expensive, but often cleaner than improvising with loose parts |
| Active EMI filter | Boosting common-mode attenuation when passive parts become too large | Inside compact power stages | Added complexity and cost, but useful when Y-capacitance is constrained |
X and Y capacitors are not generic capacitors. On mains circuits they must be safety-rated because they sit directly on hazardous voltages, and the failure mode matters. X capacitors bridge line and neutral, while Y capacitors connect line to chassis or earth and are used carefully because leakage current and touch current become part of the design limit.
For cable-borne noise, ferrite beads and clamp ferrites are often underestimated. Over their working band they become more resistive than purely inductive, so they dissipate high-frequency energy instead of simply shifting it around. That makes them useful for IoT gateways, sensor leads, USB-style interconnects, and other cable runs where a full filter module would be overkill.
Active filters are the more modern option when a passive approach becomes physically awkward. In compact power stages, they can add meaningful attenuation in the low-frequency conducted band, often around 150 kHz to 3 MHz, which is exactly where passive common-mode stages can get bulky fast. I reach for them when size, leakage current, or component count has become the bottleneck, not as a first instinct.
Once you know what each part actually does, the next step is matching the filter topology to the exact noise path you are trying to control.
How I match the filter to the noise path
The quickest mistake is to treat every interference problem like a mains-input problem. A 230 V supply, a 24 Vdc cabinet rail, a thermocouple input, and a high-speed differential link all need different treatment, even if the symptom on the bench looks similar.
| Scenario | First move | Why it works | When I would avoid it |
|---|---|---|---|
| 230 V AC power entry | Common-mode choke plus X and Y safety capacitors | Attacks both common-mode and differential noise before it spreads into the cabinet | When leakage current is already tight or the enclosure cannot support proper earthing |
| 24 Vdc control rail | Ferrite bead or LC stage close to the load | Localises switching noise from PLC modules, sensors, and small converters | When current is high enough that bead losses create heat or voltage drop |
| Analogue sensor line | Shielded twisted pair plus light filtering and solid reference strategy | Protects low-level signals without distorting them | When the signal bandwidth is already very low and extra capacitance causes settling problems |
| High-speed data cable | Common-mode choke selected for the interface | Suppresses cable radiation without crushing the differential signal | When the choke is too strong and starts degrading eye quality or skew |
| Compact switch-mode supply | Two-stage passive filter or active EMI stage | Useful when the first filter pole is not enough to reach the target margin | When layout is poor; a better layout often buys more than a larger filter |
There is a practical order to this. If the problem is common-mode noise, I look at cable shielding, chassis bonding, and choke placement first. If the problem is differential-mode noise, I focus on line-to-line capacitance, series inductance, snubbers, and source-side switching behaviour. The important point is that not every filter needs to be bigger; sometimes it just needs to be pointed at the correct mode of noise.
For industrial IoT hardware, I often see a split answer: a small ferrite bead and decoupling network on the PCB, plus a proper common-mode element at the cable exit. That combination is much more useful than trying to solve everything with one oversized part inside the enclosure.
Once the topology matches the problem, the remaining work is making sure the current returns by the path you intended, which brings me to the physical build details.
Cabling, grounding, and enclosure details that make the filter work
I have seen perfectly respectable filter circuits fail simply because the leads were too long or the shield was bonded badly. A filter only works if the high-frequency current can get where it is supposed to go with very low impedance. At RF, a few centimetres of wire can undo a lot of careful component selection.
- Place the filter at the entry point of the cabinet or PCB, not deep inside the enclosure where the noise has already spread.
- Keep the connections short and wide so the filter does not inherit extra inductance from the wiring.
- Bond to clean metal; paint, oxide, and loose hardware can ruin a chassis connection faster than many people expect.
- Terminate cable shields with a low-impedance connection, often a 360-degree termination at the entry point for high-frequency control.
- Separate noisy and sensitive runs; do not route motor leads beside analogue inputs and then blame the filter.
- Twist conductors where it makes sense; reducing loop area is still one of the cheapest EMC wins in the field.
I do not treat shield grounding as a rigid one-end-or-both-ends rule. The right answer depends on frequency, cable length, and whether the problem is a low-frequency ground loop or high-frequency radiation. In practice, the most reliable installations use low-impedance bonding at the cabinet boundary and then make the signal reference strategy work around that decision instead of fighting it.
In UK industrial settings, I also pay attention to the cabinet itself. A door with poor bonding, a cable gland with too much paint, or an earth bar that is physically awkward to reach can turn a good design into a noisy one. The filter may be electrically sound, but the enclosure has to support it mechanically.
That physical discipline is also what keeps the design aligned with compliance testing, which is the next layer of the problem.
What UK compliance means in practice
In Great Britain, EMC compliance is not just about a tidy schematic. The equipment must be designed so that the disturbance it generates does not stop radio, telecom, or other equipment from working as intended, and it must also have enough immunity for its intended use. That combination matters because a product can look quiet on paper and still fail in a live industrial environment.
In practice, I think in three buckets. First, there is emissions control, which includes conducted noise on power and signal ports and radiated noise from cables and seams. Second, there is immunity, which covers the ability to survive ESD, burst, surge, and radiated RF without unacceptable degradation. Third, there is evidence: the test reports, design notes, and component choices that show the product was engineered rather than guessed into compliance.
- Conducted emissions are usually checked in the low-frequency band where filters do the most obvious work.
- Radiated emissions often expose enclosure and cable problems that no amount of extra capacitance will fix.
- Immunity testing reminds you that a quiet product is not automatically a robust one.
- Industrial installations need extra caution around long cable runs, motors, variable-speed drives, and shared earth paths.
For product teams shipping into the UK market, I would keep one rule in mind: do not separate EMC from the rest of the engineering process. If the filter is being designed after layout, after enclosure design, and after cable routing has already been frozen, you are working with a handicap. The better approach is to treat EMC as a constraint from the start, not as a late-stage correction.
That leaves the practical question every engineer asks once a system still misbehaves: what do I fix first, and what do I leave alone?
A practical order of attack when a system still fails
When a machine, PSU, or control panel still fails after the first pass, I work backwards from the symptom instead of reflexively adding more filtering. That avoids the expensive habit of buying larger chokes to cover up a bad layout or a poorly bonded enclosure.
- Measure the failure band and decide whether the problem is common-mode or differential-mode.
- Check the entry point; move the filter closer to the connector if the current path is too long.
- Reduce the source noise with snubbers, edge-rate control, better decoupling, or a cleaner switching layout.
- Review the enclosure bond and cable shields; mechanical contact quality matters more than most people assume.
- Add only the smallest filter stage that closes the remaining gap; overfiltering can create heat, delay, leakage, or signal distortion.
If I had to reduce the whole topic to one operational rule, it would be this: fix the source, then the path, then the filter. That sequence saves time, keeps the design safer, and usually produces a cleaner result than trying to force the problem away with a bigger part count. In real electrical systems, especially in industrial automation and IoT hardware, that discipline is what separates a merely quiet product from one that stays quiet in the field.